Performance by Vitor Lago Silva – Sábado, 10.10.09, 17:00
Recording of the Live video stream performance:
08 outubro 2009
16 setembro 2009
12 agosto 2009
LIVE para o projecto TlwoD
07 agosto 2009
Max-msp Patcher e sub-patchers para o Projecto TlwoD
Neste patcher principal são recebidos os sinais de todos os sensores. Os três primeiros, no topo superior, são os da luva. Estes são usados para criarem controladores midi para manipularem parâmetros de efeitos áudio no software Live.
Os quatro seguintes são os sinais dos sensores bend dos braços e pernas. São usados para activarem aleatoriamente os áudio samples do discurso do Domenico.
Os três seguintes são os dados do acelerómetro, xyz. Só a acelaração y - lateral - é usada neste projecto, e faz acelerar o discurso com o movimento lateral, ao mesmo tempo que reduz o pitch do mesmo.
O ultimo sinal é de um swich on/off e é usado para mudar de preset de filtros áudio no Live.


With the collaboration of:
Sérgio Soares Ferreira
Filipe Valpereiro
and João Maia e Silva
21 julho 2009
1ª Apresentação pública dos projectos TlwoD e Attic Tesla desenvolvidos com o fato
The Last words of Domenico
First public presentation at LCD Party_Plano b, Porto.
ATTIC TESLA
Com a participação de João Maia e Silva.
First public presentation at LCD Party_Plano b, Porto.
Trata-se de um projecto musical onde um performer utiliza o fato sensível wireless para controlar instrumentos num set live dirigido por um músico.
First public presentation at LCD Party_Plano b, Porto.
ATTIC TESLA
Com a participação de João Maia e Silva.
First public presentation at LCD Party_Plano b, Porto.
Trata-se de um projecto musical onde um performer utiliza o fato sensível wireless para controlar instrumentos num set live dirigido por um músico.
11 julho 2009
11 junho 2009
Wireless Sensitive Suit test
Thanks the support of
Filipe Valpereiro, Sergio S. Ferreira, LCD, Uminho.
09 junho 2009
Apresentação do Fato Sensível Wireless no LCD


http://www.audienciazero.org/lcd/
http://platform01.dns-systems.net/elgg/
Thanks the support of João Maia Silva
04 junho 2009
Código para o Lilypad Arduino
/*
---- SimpleMessageSystem Example 1 ----
Control Arduino board functions with the following messages:
writepin
r a -> read analog pins
r d -> read digital pins
w d [pin] [value] -> write digital pin
w a [pin] [value] -> write analog pin
Base: Thomas Ouellet Fredericks
Additions: Alexandre Quessy
Adapted for "Fato Sensível Wireless"
Filipe Valpereiro @ inmotion.pt, May 2009
*/
// Include de SimpleMessageSystem library
// REMOVE THE FOLLOWING LINE IF USING WIRING
#include "SimpleMessageSystem.h"
// These are the pins used to connect the 4051 muxer
// for the bend sensors aka Wolverine Midi Glove
#define MUX1_A 11 // Muxer S0
#define MUX1_B 12 // Muxer S1
#define MUX1_C 13 // Muxer S2
#define MUX1_Z 0 // Analog input from muxer
// Sparkfun 16-channel muxer. Connected sensors:
// knees bend sensors
// ADXL330 accelerometer
#define MUX2_A 7 // Muxer S0
#define MUX2_B 8 // Muxer S1
#define MUX2_C 9 // Muxer S2
#define MUX2_D 10 // Muxer S3
#define MUX2_Z 1 // Analog input from muxer
#define SWITCH_A 6 // Digital input for switch button
void setup()
{
// set the pin mode, all muxer's address are OUTPUT
pinMode(MUX1_A, OUTPUT);
pinMode(MUX1_B, OUTPUT);
pinMode(MUX1_C, OUTPUT);
pinMode(MUX2_A, OUTPUT);
pinMode(MUX2_B, OUTPUT);
pinMode(MUX2_C, OUTPUT);
pinMode(MUX2_D, OUTPUT);
// Use pin as sink source (use the internal pushup resistor)
pinMode(SWITCH_A, INPUT);
digitalWrite(SWITCH_A, HIGH);
// Set the serial port baudrate. This value must be the same used in XBee radio
Serial.begin(57600); //Baud set at 9600 for compatibility, CHANGE!
}
void loop()
{
if (messageBuild() > 0) { // Checks to see if the message is complete and erases any previous messages
switch (messageGetChar()) { // Gets the first word as a character
case 'r': // Read pins (analog or digital)
readpins(); // Call the readpins function
break; // Break from the switch
// disable pin write, we don't need to mess with all the sensors plugged on the muxer's
// case 'w': // Write pin
// writepin(); // Call the writepin function
}
}
}
void readpins(){ // Read pins (analog or digital)
switch (messageGetChar()) { // Gets the next word as a character
// disable digital read, makes no sense for this project
/*
case 'd': // READ digital pins
messageSendChar('d'); // Echo what is being read
for (char i=2;i<14;i++) addr="0;">> 1) & 0x01);
digitalWrite(MUX1_C, (addr >> 2) & 0x01);
// Send finger 1, 2 and 3
messageSendInt(analogRead(MUX1_Z));
}
// read the sparkfun 16 input muxer and related analog inputs
for (int addr=0; addr<7;>> 1) & 0x01);
digitalWrite(MUX2_C, (addr >> 2) & 0x01);
digitalWrite(MUX2_D, (addr >> 3) & 0x01);
// Send knee L, R and ADXL330 X Y Z
messageSendInt(analogRead(MUX2_Z));
}
// read the switch and send it as an analog signal
messageSendInt(! digitalRead(SWITCH_A));
messageEnd(); // Terminate the message being sent
}
}
// this function is not used. just here for completeness
/*
void writepin() { // Write pin
int pin;
int state;
switch (messageGetChar()) { // Gets the next word as a character
case 'a' : // WRITE an analog pin
pin = messageGetInt(); // Gets the next word as an integer
state = messageGetInt(); // Gets the next word as an integer
pinMode(pin, OUTPUT); //Sets the state of the pin to an output
analogWrite(pin, state); //Sets the PWM of the pin
break; // Break from the switch
// WRITE a digital pin
case 'd' :
pin = messageGetInt(); // Gets the next word as an integer
state = messageGetInt(); // Gets the next word as an integer
pinMode(pin,OUTPUT); //Sets the state of the pin to an output
digitalWrite(pin,state); //Sets the state of the pin HIGH (1) or LOW (0)
}
}
*/
Created and adapted by: Filipe Valpereiro
03 junho 2009
01 junho 2009
29 maio 2009
22 maio 2009
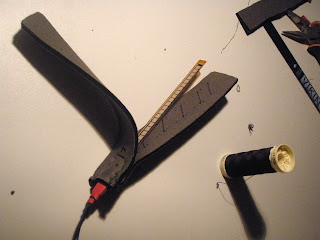
Construção de sensores bend/pressão artesanais
Estes sensores foram construídos a partir de vários tutoriais de Hannah Perner-Wilson.
Um sensor bend da Hannah:

Tutoriais da Hannah:
www.instructables.com/id/Fabric_bend_sensor_1/
www.instructables.com/id/Neoprene-Bend-Sensor-IMPROVED/
www.instructables.com/id/Stickytape-Sensors/
www.plusea.at/
Construção de várias versões de sensores:


Um sensor bend da Hannah:

Tutoriais da Hannah:
www.instructables.com/id/Fabric_bend_sensor_1/
www.instructables.com/id/Neoprene-Bend-Sensor-IMPROVED/
www.instructables.com/id/Stickytape-Sensors/
www.plusea.at/
Construção de várias versões de sensores:


Estes sensores artesanais utilizam um plástico semi-conductor - o Velostat.
Uma vez que na Universidade do Minho fazem investigação sobre polímeros, eu procurei saber se produziam este tipo de plástico na faculdade de Ciências - secção de polímeros. O resultado foi positivo, e graças à boa vontade e persistência de Antonio Vieito, conseguiu-se produzir um plástico com características próximas do Velostat, que dá para usar nestes sensores.
Exemplo de uma amostra:Uma vez que na Universidade do Minho fazem investigação sobre polímeros, eu procurei saber se produziam este tipo de plástico na faculdade de Ciências - secção de polímeros. O resultado foi positivo, e graças à boa vontade e persistência de Antonio Vieito, conseguiu-se produzir um plástico com características próximas do Velostat, que dá para usar nestes sensores.

Infelizmente estes sensores, que produzem uma variável bastante aceitável, revelaram-se inapropriados para o meu fato.
A razão é porque estes sensores, para além de serem bend, também são sensores de pressão, e uma vez instalados no interior do meu fato, sobre a pressão do tecido produz muito ruído no sinal.
Estes sensores funcionam bem se não tiverem nenhuma pressão sobre eles.
Por esta razão tive que mudar de estratégia, e voltar a usar os sensores bend industriais:

01 maio 2009
25 abril 2009
Instalação do Lilypad, sistema wireless, e bateria no fato
Subscrever:
Comentários (Atom)


